Tag: jewelry making ideas

Respect for ceramicists: A walk in their shoes

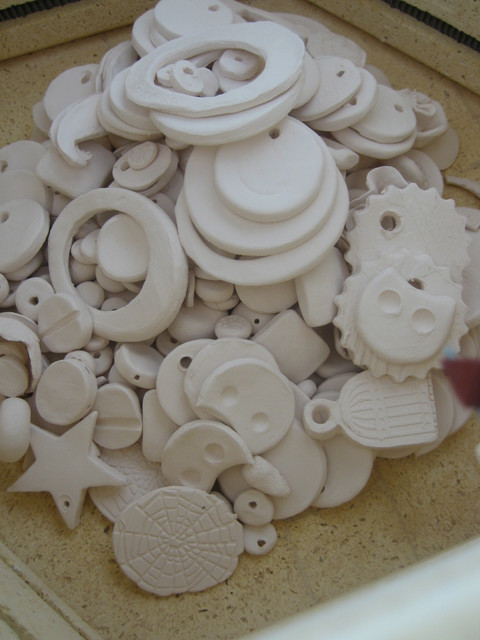
After getting a hold of a small kiln and spending almost a month playing around with clay and glaze, I have acquired the proper perspective to no longer think that anything made from ceramic is too expensive. We had fun experimenting, but boy was it a lot of work!

Bisque fired clay in the kiln.

Close-up of bisque fired clay in the kiln.

Sanding and glazing. It seemed like it took forever!

Final piece. Price: $18 million dollars.

Next stop: Welding!

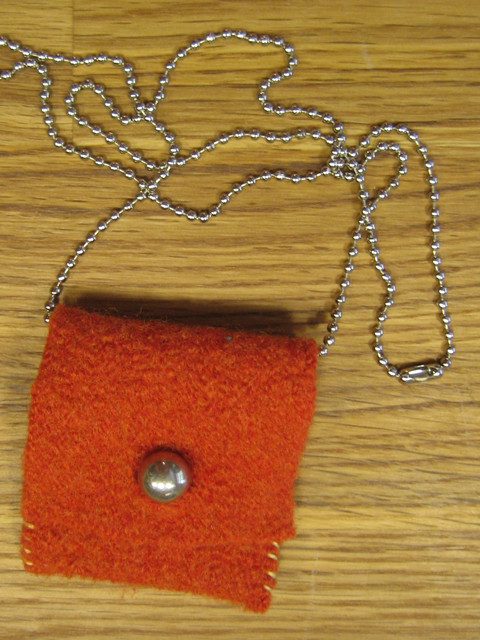
Tiny pockets made from felted sweaters

These necklaces are a pretty place to hold my treasures: “Find a penny, pick it up, and all day long you’ll have good luck.” I don’t know why I say it whenever I find a penny because it is admittedly dorky. The other day, though, I had the time to stop myself to think about it and that’s when it hit me: The act of picking something up that is as insignificant as a penny shows your gratitude for the littlest things in life. Isn’t gratitude the secret to good luck? I think it is! So now I never pass up the opportunity to get one penny richer!

The necklaces are made from seed beads, vintage buttons, felted sweaters, and decorated with embroidery and needle felting. In addition to that penny I find, these pendants are a pretty place to put a treasured photo. Here are other ones I have made: click here.

xoxSarah


DIY 345: Emboss Metal on Cuttlebug for Cuff Bracelet

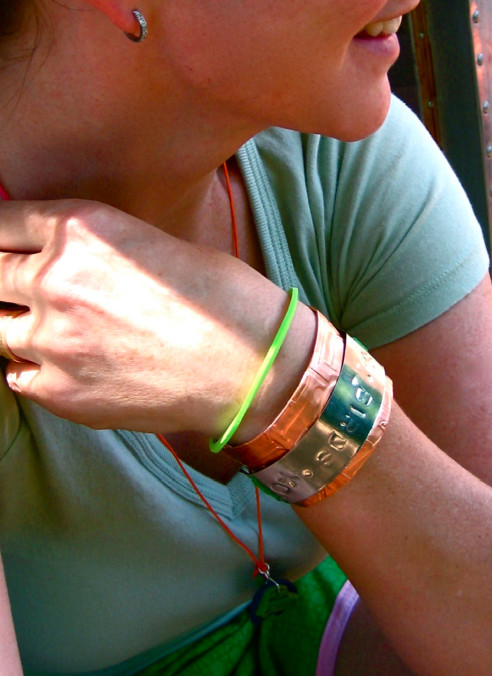
Now that I know the magic of the Cuttlebug Machine I can make all the jewelry I want. Lately I have been attracted to the tough-but-cute cuff bracelet, the kind Wonder Woman is famous for. For this one I proclaimed my love for my favorite animals~birds. Make your own, here’s how…

How to make an embossed bracelet:

  1. Buy two pieces of thin sheet metal (tin and copper) from a hardware or hobby store.
  2. Determine the correct size for your arm by wrapping a piece of paper around your wrist…be sure to leave allowance for folding the metal over an eighth inch all the way around. The metal is sharp! You’re going to want to protect yourself.
  3. You’ll need 10mm letter punches if you want to put your own words on the bracelet (buy them here.>>) Otherwise you can run both layers though the Cuttlebug.
  4. Cut the metal bands using tin snips or heavy duty scissors—watch the edges! They’re sharp!
  5. Select the patterns you would like embossed into the metal from the large line of Provo Craft embossing folders. For mine, I chose the Typeset Folder, ‘cuz you know me and the letters.
  6. With a rubber mallet punch the words into the tin and emboss the copper with the folder.
  7. Using the rubber mallet and the edge of a work surface, hammer the edges over to hide the rough edges.
  8. Adhere the two metals together using brads, and you’re done!

Now get in that invisible jet and go save the day!

Button bracelet made from screen printed scraps

Every time I screen print I use up the last little bits of ink on scraps of paper and fabric. These bits and pieces are super handy when I am looking to put my signature on some project. One day last week I was covering buttons with fabric and turned to my box of scraps to see what was there. I was so delighted with the buttons I wanted to put them all together! Follow this link to a tutorial on how to make fabric covered buttons.

I just love the YUDU. The ink colors are beautiful and non-toxic. The set up is so easy I can break it out and have it all cleaned up in under 3 hours. (That includes designing, burning screens, and going to town on anything within arm’s reach.)

DIY 360: New Life for a Baby Bracelet

Several years ago my mom was going through her old jewelry box and found my baby bracelet–a gift from my grandmother. Until recently, it’s been knocking around in my jewelry box.
I was lamenting to a friend that I didn’t know what to do with it, and Suzanne said, “put it on a necklace.” Now why didn’t I think of that.
Now, this is one of my very favorite pieces, reminding me of three generations.

Until tomorrow–Sarah