Tag: good craft ideas

Wool sweater sleeve covers a flower pot

September is a busy month for birthdays. That means I am extra crafty this time of year. My awesome mother-in-law’s birthday is today and I whipped out this cute little thing in under an hour. She loves to have herbs on her sill for easy picking, so I think she’ll be thrilled.

I used a wool sweater that didn’t end up felting in the wash. What you see here is the end of the sleeve (the cuff is at the bottom of the pot.) It’s easy to do. Find a pot that fits into the arm hole of the sweater. It could be any sweater, actually, not just wool. Slip the pot in, and cut the arm high enough so it tucks in but doesn’t hit the bottom. Then, drop in a small potted plant. This Sage plant was purchased at a local nursery.

I had to add a little something special, of course, so I needle felted two mushrooms in her favorite colors.

Handmade African Teak tray for a birthday gift

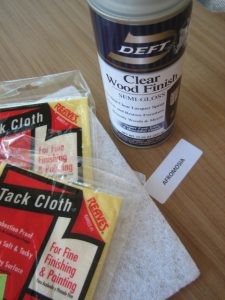
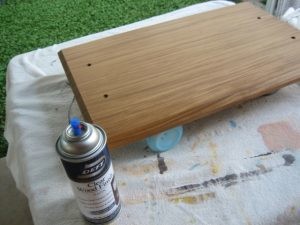
Recently, I needed an extra special gift, so I enlisted the woodworking skills of my most excellent husband to help me make this serving tray. I bought the wood at Woodworkers Source, and my friends at Modern Manor (a mid-century modern furniture store on the Melrose Curve in Phoenix) gifted me the handles. The pictures below illustrate the process…hover your mouse over the images for descriptions.

Now I want to make one for myself!

Until tomorrow~Sarah

Button bracelet made from screen printed scraps

Every time I screen print I use up the last little bits of ink on scraps of paper and fabric. These bits and pieces are super handy when I am looking to put my signature on some project. One day last week I was covering buttons with fabric and turned to my box of scraps to see what was there. I was so delighted with the buttons I wanted to put them all together! Follow this link to a tutorial on how to make fabric covered buttons.

I just love the YUDU. The ink colors are beautiful and non-toxic. The set up is so easy I can break it out and have it all cleaned up in under 3 hours. (That includes designing, burning screens, and going to town on anything within arm’s reach.)

DIY 355: Organize Bobbins On Bamboo Skewers

I have been sewing a lot lately, and it is my tendency to trade up the colored thread on a minute-by-minute basis. You know~those of you out there who wonder about storing bobbins~that the more you handle bobbins the more tangled, lost and aggravating they become. Well, I have finally found a solution I want to share.

Keep Bobbins Neat and Organized On Bamboo Skewers:

Buy a bag of skewers at the supermarket and color a few (if you care to~I do!) from tip to tip with a permanent marker. I prefer about 5 bobbins per skewer.
Measure and wrap in tape "stopper"
Next you'll want to put a tape "stopper" to hold the bobbins toward the top of the skewer. Here I have my prescribed five bobbins on and tape stuck to mark where to begin.
Twirl the tape on until the mass is larger than the bobbin hole. This will stop the bobbins from sliding down to the bottom and falling off.
Once the bobbins are all on the skewers trim any loose threads. (Do this every time the threads get out of hand~it's that easy!)
Finally, put all the skewered bobbins in a narrow necked bottle and place on your sewing table. You'll be amazed how much simpler bobbin changing will be!

One last thing: I discovered I can take all my bobbins with me. Simply grab the whole shebang and lay them in your traveling case. A rubber band gently wound around the skewer tips can keep them from flying off. Happy sewing, and I hope you have a wonderful weekend!

Until tomorrow~Sarah

DIY 356: Keep an Ideas Binder

Every time a magazine or website appeals to me, I clip out photos and ideas and pop them into a big binder. I keep it handy so it’s easy to file things and the clippings don’t pile up. It is, quite literally, my brain food. That, an a good cup of coffee, and I am ready to get creative.

Make your own Ideas Binder:

  1. Buy the largest binder (about 2″ will do) as well as clear pockets from your local office supply store.
  2. Use tabs to mark sections, like: Home, paper, embroidery, color combos, and others areas of interest.
  3. Start cutting images from all the magazines you receive in the mail, then move onto sites with good ideas.

In no time your biunder will be bulging with great references you can use!

Until tomorrow~Sarah

DIY 357: How to Make a Rag Flower Hair Pin

I have been admiring all the rag flower hair clips and pins in Anthropologie and I have been hankering to make some for myself. Turns out it’s really easy!

How to Make a Rag Flower Pin:

Cut fabric into strips (1″x20″)
Tie 3 strips together. Leave a little “tail”. It will be the center of the flower
Twist first strip.
Run lines of glue, and begin wrapping twisted piece around center knot
Tuck end in and glue, and repeat process with other 2 strips.
Twist, wrap and glue all three stips.
If you need to, secure with a pin until dry.
Choose a fastener and sew on the back after the glue is dry.
Snip center of flower to fluff out the center.
Use the iRock to apply some sparkle.

Have fun! Have a great weekend!

Until Tomorrow~Sarah

DIY 358: Easy Home-made Jewelry with Sculpey

The summer vacay bug has bitten, and I am getting really excited to go camping. So much in fact I made three charms using Sculpey and stamps I own.

Make your own charms out of Sculpey:

  1. Purchase desired colors of Sculpey at a craft store
  2. Buy or use inking stamps. The bolder shapes and simpler lines are easiest to work with
  3. Follow directions in working with Sculpey. I found that kneeding the clay in your had to warm it up makes it very easy to work with
  4. Press into the stamps
  5. Cut away excess
  6. Use a pencil or pointy end to poke a hole in the clay where you want it to hang
  7. Bake according to directions on the box

Zooming around on the internet looking for info about Sculpey, I ran across this funny little animated short…check it out.

Sculpey the Slug — an animated short from KMPer02 on Vimeo.

Enjoy!

Until Tomorrow~Sarah