Want a white pumpkin but can’t find them in the market? Use inexpensive craft acrylic paint (in a cream or off-white color) and make them yourself. And you don’t have to stop at white either~try black, purple, even metallic~follow your heart!
Tag: DIY
Halloween craft idea #5: head on a stick marshmallows
How to make head-on-a-stick marshmallows:
- Buy large marshmallows, red licorice, black gum drops and bamboo skewers.
- With a sharp knife, slice halfway through the side to make a mouth.
- Skewer marshmallow.
- Open mouth and add a slice of red licorice for the tongue.
- Cut off tiny pieces of gum drops for eyes.
- Put heads in a tall jar filled with licorice vines.
For “hair,” cut off the top of the head to expose sticky marshmallow. Color coconut with food coloring and press into the top.
Halloween craft idea #4: torture-tilla chips
Halloween craft idea #3: puffball spiders
Fast and really easy! Take a black pipe cleaner and cut it into four equal pieces. Twist them all together and glue on a black puffball. Go crazy and add eyes if you want to~either way they are fun crawling all over your Halloween table of goodies! For a Step-By-Step Follow this Link >>
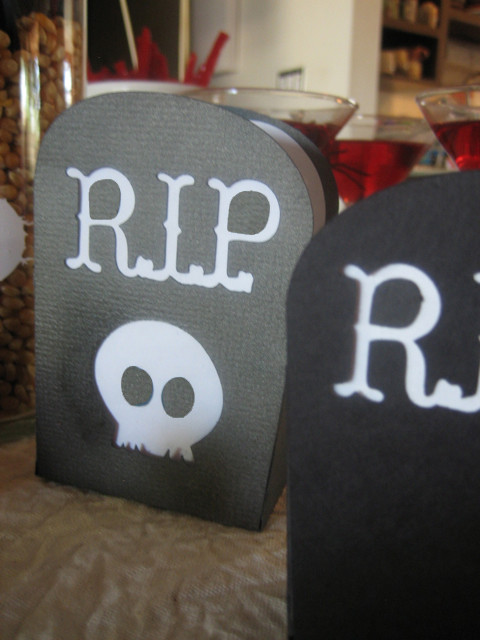
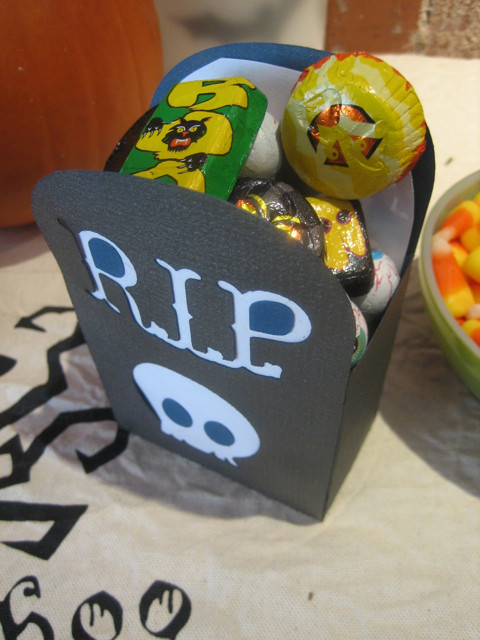
Halloween craft idea #2: R.I.P. candy votive
This votive holder was cut on the Cricut Expression / Gypsy with the Happy Hauntings cartridge. Here are directions for making your own:
How to make Halloween votive holders:
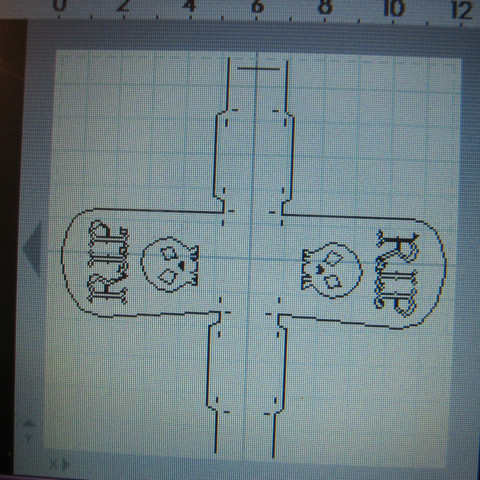
1. Pull in the Tombstone, the skull and the RIP from the Happy Hauntings cartridge. (The cartridge must be loaded onto a Gypsy in order to do this exact project. If you don’t have a Gypsy, you may just cut the Tombstone out on the Cricut. NOTE: Make the headstone stretch to 12×12, The sides of the headstone box will fall off the edge. See photo below.)
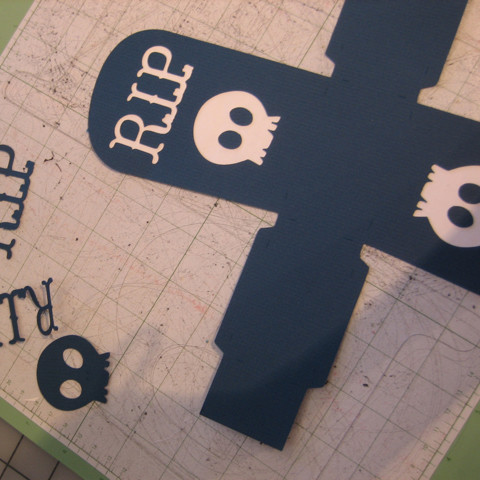
2. Cut out the headstone box (see below) on card stock or Bazzill Basics paper. I chose a denim blue here because I will be spray painting it black and I want some of the blue to show through.
3. Using metallic finish black spray paint, spray the headstone votives.
4. Once dry, trim the sides and use double-stick tape to assemble (see below.)
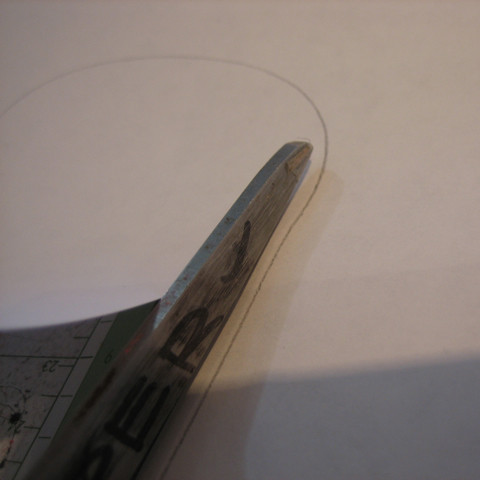
5. Use leftover card stock as a template to cut out the “window.” Trace the curve onto white copy paper. (See next two pictures.)
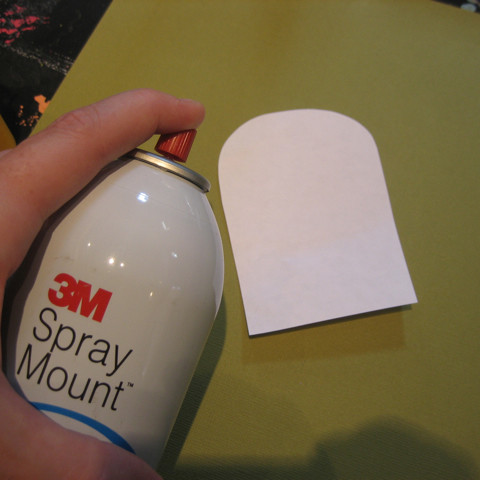
6. Spray glue onto one side of white paper and insert into headstone. Spray glue small pieces to add to the inside of letters and skull eyes (see next two photos.)
7. Fill with foil wrapped candy and put one at every place on the table.
Halloween craft idea #1: paper skeletons
Time to call in the skeleton crew~the Halloween countdown has begun.
This centerpiece will haunt the treats table at our party. The body and bones were cut from the October 31st cartridge on the Cricut Expression~the parts were assembled in various stances and dances using tacky glue. Then they were hung from a tree branch that was painted black and screwed to a board (to keep it standing). Make your own below…
How to make your own Skeleton Crew Display:
- Cut a branch from a tree (a citrus branch was used in this photo)
- Spray paint a metallic black
- Screw or nail to a 8″ long 2×6 piece of board. (Tip: if you don’t have the means necessary for assembling a board, put the stick in a vase and fill with beans…or river rocks if your stick is larger).
- For the skeletons, cut bodies and bones out of white card stock from the October 31st cartridge on the Cricut Expression.
- Assemble skeletons in various ways using tacky glue.
- Punch a small hole in the top of each head to attach hanger.
- String filament or Gutermann’s Sulky Invisible thread through the hole in the heads and loop-tie the other end.
- Arrange on the tree so each skeleton can turn freely.
YUDU Workshop (screen prints for Halloween)
Last Saturday I ran a YUDU workshop. Here are pictures from the event. I will be holding three events in October, and two each in November and December. They are Holiday themed, so join me for the fun and leave with gifts or decorations for your home! Follow this Link to the calendar of events >>
This is the YUDU 101 class:
Here we are discussing the various parts of the YUDU.
In the photo below, I am arranging cut paper on the light table. The screen with emulsion on it gets placed over this, and then the image is burned into the screen. The bats are cut on the Cricut Expression with the Happy Hauntings cartridge.
Once the screen is exposed to light~which hardens the light-sensitive emulsion~it is time to wash out the screen in the sink. This basic laundry sink is a perfect size (below).
When the screen is completely dry it’s time to tape off the areas of the screen we don’t want to print (anything that appears white~that is the bare screen).
We only want to print one bat. Below, you can see that everything is taped off except what we need. Put the screen into the YUDU machine and get ready to print.
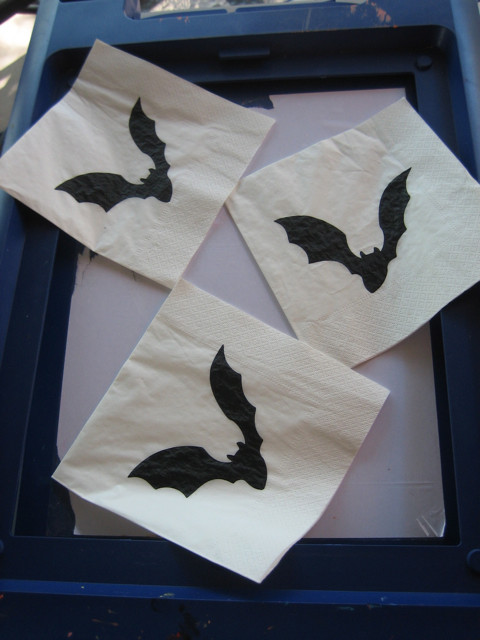
We printed napkins for an upcoming Halloween Party. The photo below shows placement under the screen.
Squirt out a good amount of ink~enough to run a thick blanket of ink over the image (this is called “flooding the screen.” The next swipe is with enough pressure to push the ink through and onto the napkin.
In the photo below, students try their hands at screen printing. It is a viscerally exciting process. So Fun!
Be sure to join me at my upcoming workshops~Screen Printing is one of the most fun crafty things you can do, and you’ll leave with some cool stuff!
Prevent flower pot deterioration with roofing tar
Have you noticed that after a while a terra cotta planter will disintegrate before your eyes? I have lost many a favored pot to the ravages of water and minerals leaching through the walls of the vessel. To prevent this from happening, coat the inside with elastometric roof coating (found at Ace Hardware)~it creates a barrier between the wet soil and the porous terra cotta. A gallon is quite expensive (about $100), but it will last for a long time if all you’re doing is coating pots. It is worth the investment.
DIY 344: Pretty paper bookmarks
Black and White and Read all over! That’s the state of my library. I have lent out so many books, and received so many in return I cant keep track. That is~until now.
I decided I needed a way to track my books and remind my friends~in a pretty way~of who owns what. Every time I lend a book I make a book plate to put inside. It has my name on it with the date. When I return a book, I make a special “Thank You!” by tucking in a cute bookmark, like this one. Everyone remembers and I even get requests to borrow books because everyone wants a bookmark!
Here’s how to make this bookmark:
- White Bazzill Basics paper in the Cuttlebug with the A2 Floral Fantasy Emboss Folder
- Black Bazzill Basics paper in the Cricut Expression Machine using the Cindy Loo Cartridge
- Navajo Blue Bazzill Basics paper hand cut bird
- All pieces glued using tacky craft glue
- Ribbon strung through hand cut hole and fastened with white brad.
It’s that easy!
Happy Reading!
DIY 345: Emboss Metal on Cuttlebug for Cuff Bracelet
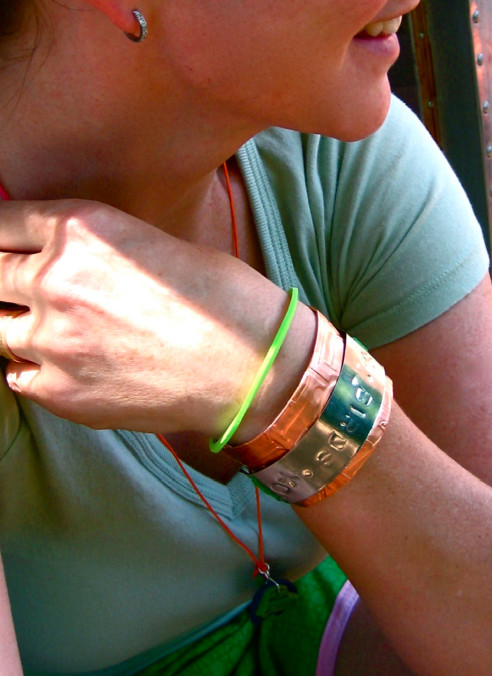
Now that I know the magic of the Cuttlebug Machine I can make all the jewelry I want. Lately I have been attracted to the tough-but-cute cuff bracelet, the kind Wonder Woman is famous for. For this one I proclaimed my love for my favorite animals~birds. Make your own, here’s how…
How to make an embossed bracelet:
- Buy two pieces of thin sheet metal (tin and copper) from a hardware or hobby store.
- Determine the correct size for your arm by wrapping a piece of paper around your wrist…be sure to leave allowance for folding the metal over an eighth inch all the way around. The metal is sharp! You’re going to want to protect yourself.
- You’ll need 10mm letter punches if you want to put your own words on the bracelet (buy them here.>>) Otherwise you can run both layers though the Cuttlebug.
- Cut the metal bands using tin snips or heavy duty scissors—watch the edges! They’re sharp!
- Select the patterns you would like embossed into the metal from the large line of Provo Craft embossing folders. For mine, I chose the Typeset Folder, ‘cuz you know me and the letters.
- With a rubber mallet punch the words into the tin and emboss the copper with the folder.
- Using the rubber mallet and the edge of a work surface, hammer the edges over to hide the rough edges.
- Adhere the two metals together using brads, and you’re done!
Now get in that invisible jet and go save the day!
