Tag: DIY everyday

DIY 342: Bag (lady) pillow

Now that the nice weather is around the corner here in Phoenix, I am gearing up for cocktail hours in the garden. This year I am particularly excited because we are finally building the ramada I have been dreaming about for years. For the furniture I need throw pillows that are easy to care for, so I am collecting fun tea towels on sale and canvas bags to sew up.

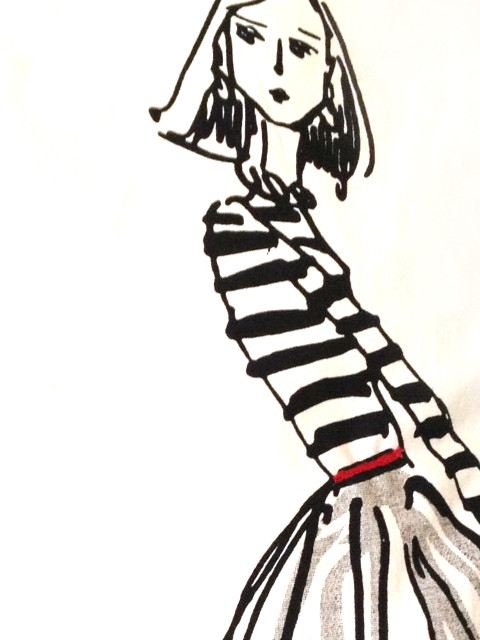
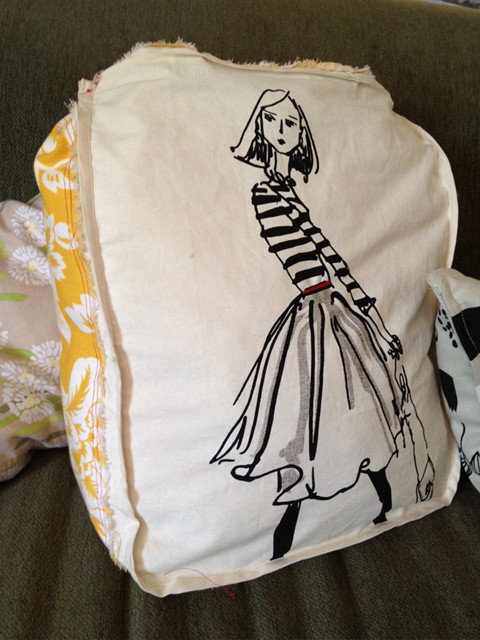
On a recent run of retail therapy with CC, we stopped into Ann Taylor to see what was on sale. We hit the jackpot, and with it came this fabulous canvas bag. I tore strips of a favored pattern and sewed it along the edge to cover the logo.

The pretty girl only needed a red belt to be appropriately accessorized. I embroidered that on the machine and within an hour I had my first throw pillow for the new outdoor space.

These tea towels were the easiest things to make. They were on sale at Sur la Table. And since they were already screen printed in my style, all I had to do was fold over, stuff and sew. Done!
Holiday wreath made from sticks and twine

The Ladies and I made holiday decorations this weekend. Suz was on a roll and made a wreath for every room in her house and inspired me to make one for my front door. Of course it had to have a bird on it…

We are fortunate to have citrus trees in our garden not only for the obvious reasons, but the limbs naturally die off leaving beautifully curved branches that are easy to harvest. They are close to the ground and break off in my hand. I chose ones that curved the most and lashed them together with sisal twine.

Halloween Party Time!

Halloween craft idea #1: paper skeletons >>
Halloween craft idea #2: R.I.P. votive holder >>
Halloween craft idea #3: puffball spiders >>
Halloween craft idea #4: torture-tilla chips >>
Halloween craft idea #5: head on a stick marshmallows >>
Halloween craft idea #6: paint a pumpkin >>
Halloween craft idea #7: screen print a table runner >>
Halloween craft idea #8: spiderweb mobile >>
Halloween craft idea #9: pumpkin cupcakes >>
Halloween craft idea #10: decorate existing bowls with vinyl >>
Halloween craft idea #11: candy and cupcake tier >>
Halloween craft idea #12: tombstone candy holder >>
Halloween craft idea #13: monsters memory game >>
Halloween craft idea #14: trick-or-treat bag >>
Halloween craft idea #15: blackbird butterfly tree >>
Halloween craft idea #16: YUDU screen printed bat placemats>>
Halloween craft idea #17: YUDU screen printed bat napkins
Halloween craft idea #18: Black bean soup >>
Halloween craft idea #19: trick-or-treat bucket >>
Halloween craft idea #20: hot glue spiderweb for the window >>

YUDU Workshop (screen prints for Halloween)

Last Saturday I ran a YUDU workshop. Here are pictures from the event. I will be holding three events in October, and two each in November and December. They are Holiday themed, so join me for the fun and leave with gifts or decorations for your home! Follow this Link to the calendar of events >>

This is the YUDU 101 class:

Here we are discussing the various parts of the YUDU.

In the photo below, I am arranging cut paper on the light table. The screen with emulsion on it gets placed over this, and then the image is burned into the screen. The bats are cut on the Cricut Expression with the Happy Hauntings cartridge.

Once the screen is exposed to light~which hardens the light-sensitive emulsion~it is time to wash out the screen in the sink. This basic laundry sink is a perfect size (below).

When the screen is completely dry it’s time to tape off the areas of the screen we don’t want to print (anything that appears white~that is the bare screen).

We only want to print one bat. Below, you can see that everything is taped off except what we need. Put the screen into the YUDU machine and get ready to print.

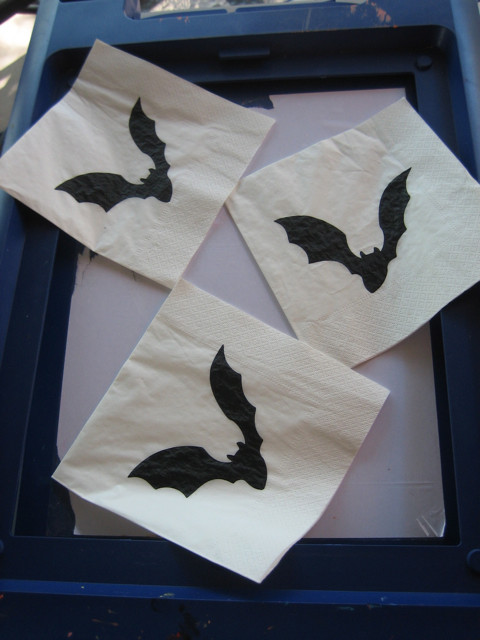
We printed napkins for an upcoming Halloween Party. The photo below shows placement under the screen.

Squirt out a good amount of ink~enough to run a thick blanket of ink over the image (this is called “flooding the screen.” The next swipe is with enough pressure to push the ink through and onto the napkin.

In the photo below, students try their hands at screen printing. It is a viscerally exciting process. So Fun!

Be sure to join me at my upcoming workshops~Screen Printing is one of the most fun crafty things you can do, and you’ll leave with some cool stuff!

DIY 344: Pretty paper bookmarks

Black and White and Read all over! That’s the state of my library. I have lent out so many books, and received so many in return I cant keep track. That is~until now.

I decided I needed a way to track my books and remind my friends~in a pretty way~of who owns what. Every time I lend a book I make a book plate to put inside. It has my name on it with the date. When I return a book, I make a special “Thank You!” by tucking in a cute bookmark, like this one. Everyone remembers and I even get requests to borrow books because everyone wants a bookmark!

Here’s how to make this bookmark:

  1. White Bazzill Basics paper in the Cuttlebug with the A2 Floral Fantasy Emboss Folder
  2. Black Bazzill Basics paper in the Cricut Expression Machine using the Cindy Loo Cartridge
  3. Navajo Blue Bazzill Basics paper hand cut bird
  4. All pieces glued using tacky craft glue
  5. Ribbon strung through hand cut hole and fastened with white brad.

It’s that easy!

Happy Reading!

DIY 346: Spa Party~personalized lipgloss and nail polish favors

Recently, the Girls got together and had a Spa Party. CC hosted, SB provided the food, CM brought the ingredients to make lotions and potions and I personalized the party favors. We each invited another friend and had a great time celebrating our friendship and making new friends. At the end of the day we all left with several containers of handmade beauty products and these fun little favors (pictured above).

Make your own personalized lip gloss and nail polish favors:

  1. Buy products in packaging that is nearly devoid of design and type. Often, products like these can be found at Target or other box stores.
  2. Buy rolls of vinyl made for the Cricut Expression cutting machine. If you do not have the Cricut Expression, you may hand cut the vinyl with sharp scissors.
  3. For these designs, use the Cindy Loo cartridge and Give a Hoot cartridge. Hand cut the cloud for behind the flying bird.
  4. Position the vinyl pieces over existing logos and type on the bottles.
  5. Place each pair in a pretty bag for giving, or put at each place-setting at the table.

Until Tomorrow~Sarah

Wool sweater sleeve covers a flower pot

September is a busy month for birthdays. That means I am extra crafty this time of year. My awesome mother-in-law’s birthday is today and I whipped out this cute little thing in under an hour. She loves to have herbs on her sill for easy picking, so I think she’ll be thrilled.

I used a wool sweater that didn’t end up felting in the wash. What you see here is the end of the sleeve (the cuff is at the bottom of the pot.) It’s easy to do. Find a pot that fits into the arm hole of the sweater. It could be any sweater, actually, not just wool. Slip the pot in, and cut the arm high enough so it tucks in but doesn’t hit the bottom. Then, drop in a small potted plant. This Sage plant was purchased at a local nursery.

I had to add a little something special, of course, so I needle felted two mushrooms in her favorite colors.